{source}
What’s for Dessert: Candy Cookie Cones
makes 12
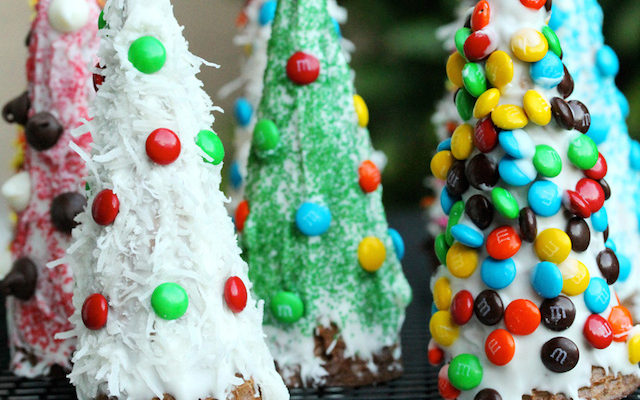
Here’s a spruced-up version of a holiday tradition we always make in the Bischoff house. We call them Candy Cone Christmas Trees, she calls them Candy Cookie Cones. Her ideas are awesome, so I’ve included her entire process here and I recommend you visit her website, Coupon Clipping Cook, for lots of photos! But I’ll be honest with you and tell you that we do a much simpler version of these… we simply decorate sugar cones with frosting (I don’t make candy coating – regular frosting in any color works wonderfully!) and different candy toppings. No cookie inside, no sticks, no baking, and ours are never as beautiful as these, but my kids find them magical somehow, and look forward to making them every year. Maybe this year we’ll try adding the cookie inside. Sounds fun!
Ingredients:
Cookie Cones:
12 sugar cones
12 long lollipop sticks
3 pieces of foil (each one about 10 inches long)
Filling:
12 tablespoons of cookie dough
12 tablespoons of chocolate chips
Topping:
8 ounces of Vanilla Candy Coating (4 squares of Almond Bark)
8 ounces of Chocolate Candy Coating (4 squares of Almond Bark)
½ cup of shredded coconut
½ cup of mini M&M candies
¼ cup chocolate chips
¼ cup white morsels
colored candy sprinkles
Directions:
If needed, lower the top rack in the oven so that the sugar cones won’t be too close to the top of the oven. Preheat the oven to 350 degrees F. Remove the sugar cones from the package and put them in an upright dish for easy handling. A sundae dish or tall mug works well for this. Add about 1 tablespoon of cookie dough into the bottom of each sugar cone.
The dough should fill about ½ of each sugar cone. The empty space that's left at the top of the sugar cone should be enough room for the dough to rise (if there is too much dough in the sugar cone it will run over the sides in the oven). Set the cones aside while you prep the foil.
Squeeze each piece of foil into a tight donut-type shape with a small inner circle so that the tip of the sugar cone will fit tightly in the middle of the foil. Lay each piece of crumbled up foil at the bottom of a bread loaf pan. Add the sugar cones bottom side down (with the pointy side down) into the foil. Squeeze the foil tightly around the cones so they stand up straight. Add more crumbled up pieces of foil in the bottom of the pan if needed to prop up the cones securely.

{source}
If you’re baking a few of the sugar cones at a time, a bread loaf pan works well; or if you’re baking all of the sugar cones at one time, a large pan with similar depth such as a roaster pan works well. Bake in a preheated oven for about 18 minutes or until the cookie dough is cooked. Keep a close eye on the sugar cones to make sure the tops don’t burn. When the cookie cones are done, remove them from the oven. Leave them in the baking pan and while they are still hot, add chocolate chips in the middle of the cone all the way to the top of the cone.
Then add a lollipop stick in the middle of each cone poking it through the chocolate chips and the soft cookie. Let the cookie cones cool completely in the baking pan. Add the candy coating to a small bowl and heat it in the microwave for 25 seconds. Then give it a stir if possible. Then heat it for another 25 seconds and give it another stir. If it still needs more time heat it for another 10 seconds.
Hold the cookie cone by the stick in one hand and with the other hand dip the back of a small spoon in the candy coating and spread it on to the sides of the cookie cone. Spread it on a bit thick so that there is enough area for the candies to stick. Then immediately add the toppings to the candy coating so they will stick. Let the candy coated cookie cones completely cool. Some options for storing the cookie cones while they cool are to put them stick side down in a tall mug, medium size glass, sundae dish, or in between the holes on a cooling rack stand.

{source}
What are your favorite traditional holiday treats to make with kids? Please share yours in the comments below!
SLO Classical Academy is not affiliated with the above mentioned website.